
Photoshop如何制作简洁个性的文字人像海报
来源:站酷 作者:野鹿志作者制作文字人像的方法比较实用。前期需要把人物抠出,并单独把暗部区域选出后填色;然后新建图层,用暗部区域选区添加蒙版;再用定义好的文字笔刷在人像部分刷上文字;最后再润色。最终效果
 1、素材拖进ps,ctrl+j复制一层。
 2、上面的文字我们先用选框工具-填充-内容识别去掉,后面需要自己加文字效果的。
 3、去掉以后大概这个效果。
 4、然后新建阈值调整图层。
 5、参数大概这个样子就可以了。
 6、ctrl+shift+alt+e盖印所有可见图层,隐藏除了盖印图层之后的所有图层。因为我们要把背景的白色去掉,所以选择-颜色范围-选区图中的黑色部分。
 7、ctrl+j复制选区新建图层。
 8、我们一会儿要做的是文字云,所以我们现在需要添加一个已经抠出来了的人物蒙板,在上面排字。直接新建一层空白图层,然后按住ctrl点击抠出来的人物图层缩略图载入选区,再点击新建图层蒙板。
 9、在刚才抠出来的图层下面新建一个图层,填充一个白色充当背景。
 10、到这里图片的处理就差不多了,我们准备开始处理文字了,其实文字也很简单,不需要一个一个的排版。我们先新建一个画布,尺寸随意,选一个好看的字体,键入。
 11、编辑-定义画笔预设。
 12、再回到刚才的画布,画笔工具选择你刚才预设的画笔。
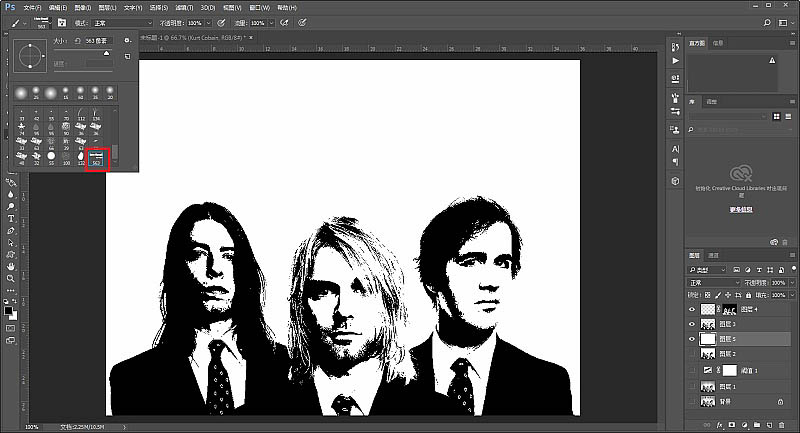 13、这里调整一下画笔的参数,把形状动态里的大小抖动调整一下,这样,字的大小就会比较随机的出现在画面里。因为我选的字体颜色是黑色,所以我调整了一下人物图层的不透明度,防止看不清楚效果。
 14、接下来就是在空白的图层上不停的点字啦。个人觉得没什么技术难度,只要主要文字与文字不要重合在一起就好了。
 15、再给海报加个标题吧,Nirvana是Grunge,那就加个夸张点的字体,同时给主标题添加图层样式,参数大致这样。
 16、接下来再调整一下颜色,新建渐变调整图层。
 17、选择默认的蓝、黄、蓝的渐变,参数大致如下。
 18、再将图层的混合模式改为柔光。
 19、这样基本就差不多了,再和前面的方法一样,给海报加一个边框。
 20、要是你对背景颜色不满意,也可以对之前的白色背景图层填充其他颜色进行调整,我觉得挺好,就不调啦。
 最终效果:
最终效果: