
Photoshop合成墙帘后的奇幻世界

最终效果

1、打开PHOTOSHOP,按CTRL+N新建一个文档。大小为1024x720像素(这是高清壁纸的尺寸)。

2、把墙壁的素材拖进来,然后按CTRL+T调整好大小和位置。

3、在把女孩打开窗帘的素材也拖进来,然后按CTRL+T调整好大小和位置。

4、使用钢笔工具或套索工具选择出白色的部分,我这里用的是钢笔工具。
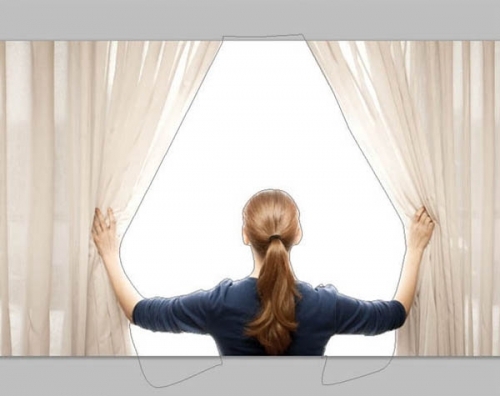
5、按CTRL+ENTER把路径转换成选区,然后羽化1~2个像素(CS5的羽化在选择/修改/羽化)。

6、点击图层/图层蒙板/隐藏选区,得出效果如下。

7、在使用套索工具把女孩的手给选择进来。按ALT点击女孩图层的图层蒙板(载入选区)。

8、使用套索工具,按住ALT键(图标变成减号),把人物和手臂给选择出来。下图我使用套索工具扣出了左边部分。

9、右边也是同意道理。

10、把墙壁图层移到女孩图层的上面,如图。

11、选择/反选,然后点击图层/图层蒙板/隐藏选区。效果如下。

12、然后我想让墙壁像窗帘一样拉开,要怎么做呢?请继续往下看...复制女孩图层,放到墙壁层的上面。然后图像/调整/去色。

13、我只想给窗帘去色,而不想改变女孩的颜色。按CTRL点墙壁(bricks)层蒙板的缩略图载入选区。

14、回到副本层,选择/反选,让选区变成人物。点击副本层的蒙板,然后使用画笔工具(前景色为黑色)涂抹人物。

15、选择回副本的图像层,图像/调整/色阶,让窗帘对比变得更强烈一些。

16、设置混合模式为叠加,看看是不是出来一些效果了。

17、不过效果不是很明显,在复制一层。混合模式同样是叠加,在调整下色阶。

18、在新建一个1256x720的画布,把女孩素材拖进去。然后图像/调整/去色。在调整下色阶,得到类似下面的效果。

19、保存文件为PSD格式,一会置换时要用到。

20、回到之前做的图,点击墙壁图层。滤镜/扭曲/置换,选择适当的比例,然后按确定。在弹出的选择窗口中选择刚才保存的女孩PSD文件。


21、接下来调整一下画面的颜色。图层/新建调整图层/渐变映射。

22、然后设置渐变为黑白渐变。

23、图像/新建调整层/照片滤镜。颜色为橙色,浓度为60%。

24、图像/新建调整层/色相/饱和度,降低饱和度为-20。

24、开始做墙壁外的风景。打开风景素材图片,拖动到背景层上面。


25、调整下风景的饱和度,让和墙壁更接近。图像/调整/色相饱和度。

26、营造下氛围,新建一个图层,填充黑色并放到最上面。

27、选择白色笔刷,设置直径为2500PX,硬度为0。在黑色中间点几下,得到如下效果。

28、设置混合模式为正片叠底,不透明度80%,得到如下效果。

29、按CTRL+SHIFT+ALT+E盖印一个图层,然后滤镜/模糊/高斯模糊,模糊10像素。设置图层混合模式为滤色,不透明度60%。

最终效果:
