
Photoshop打造飞溅的艺术脸谱
流体效果越来越流行,这种效果风格独特,效果非常有艺术感。制作方法并不复杂。关键是喷溅素材的应用,选定好主体后,把喷溅素材融合进去即可。
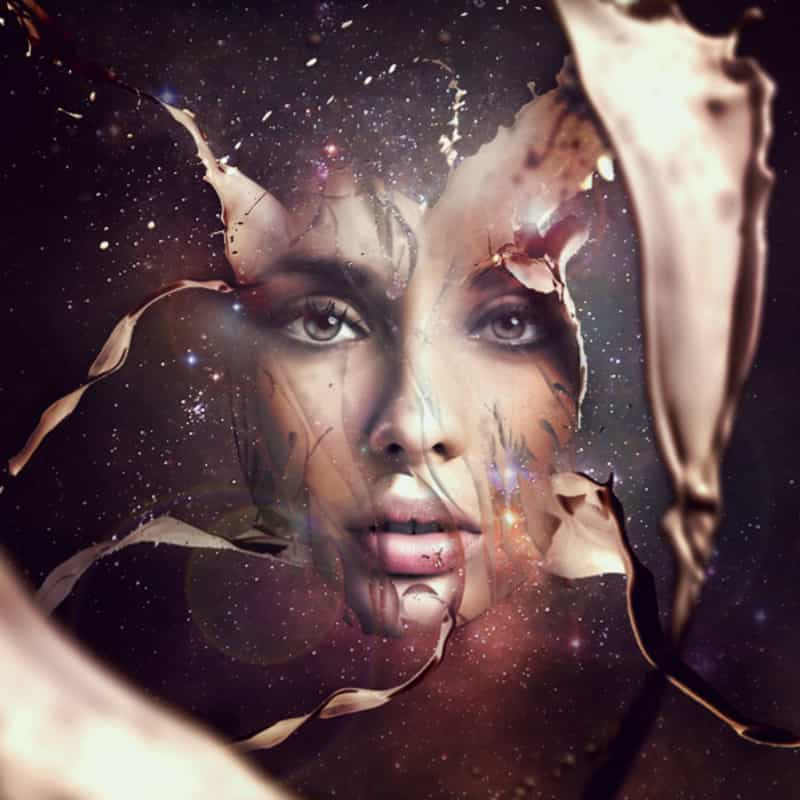
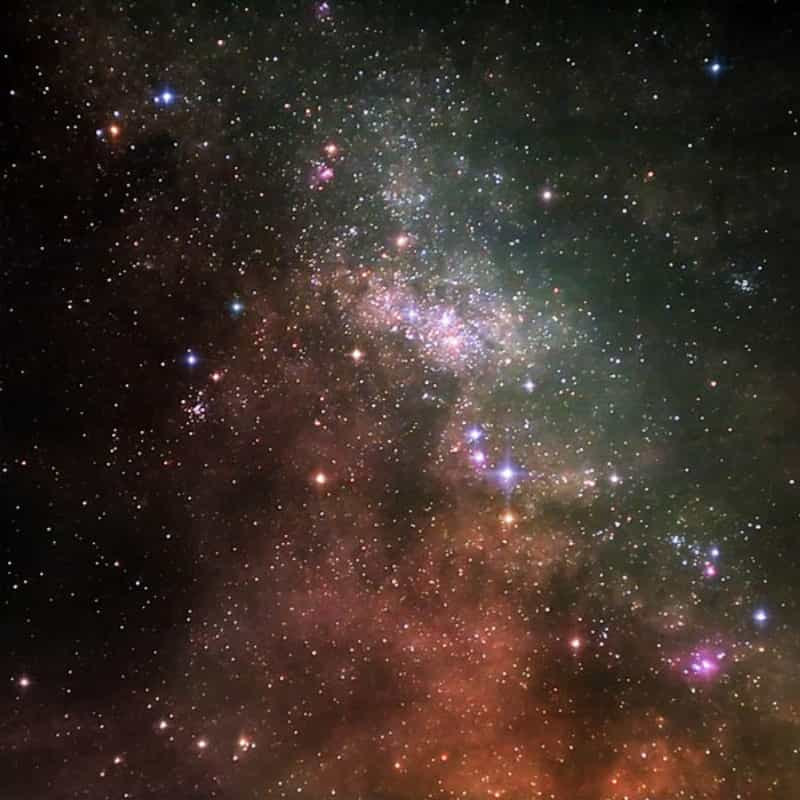
最终效果
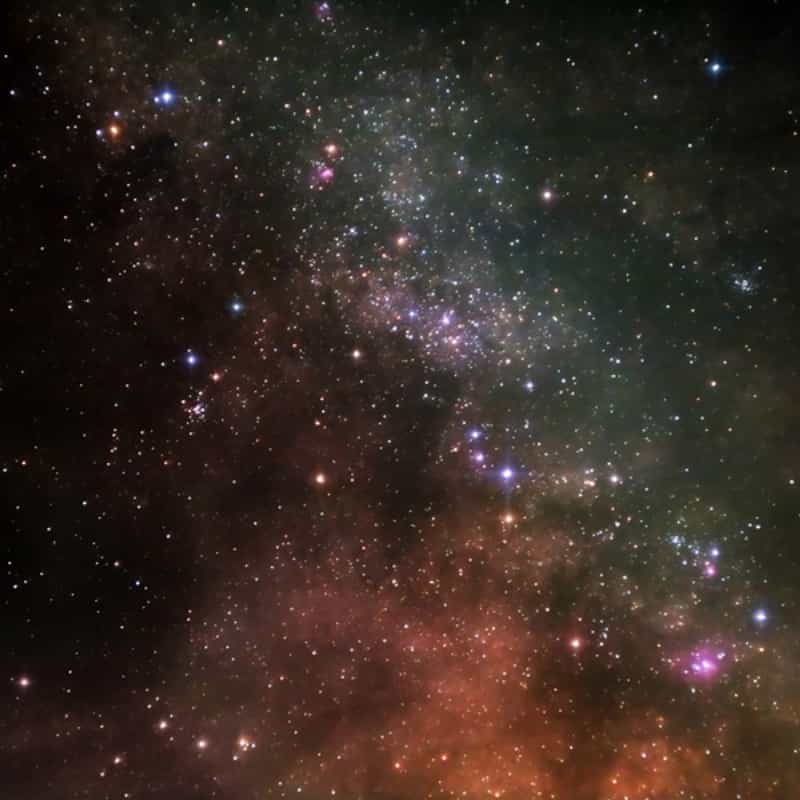
1、打开下图所示的背景素材。
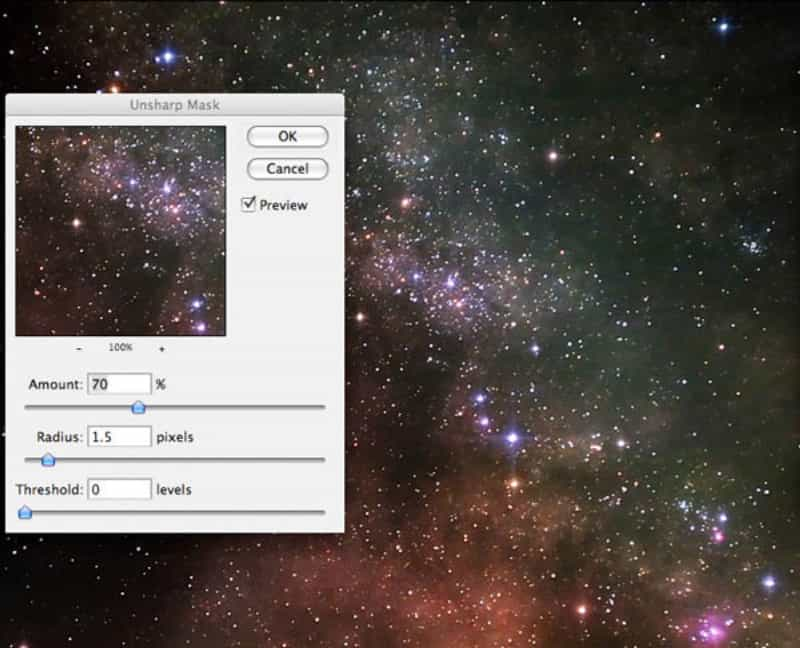
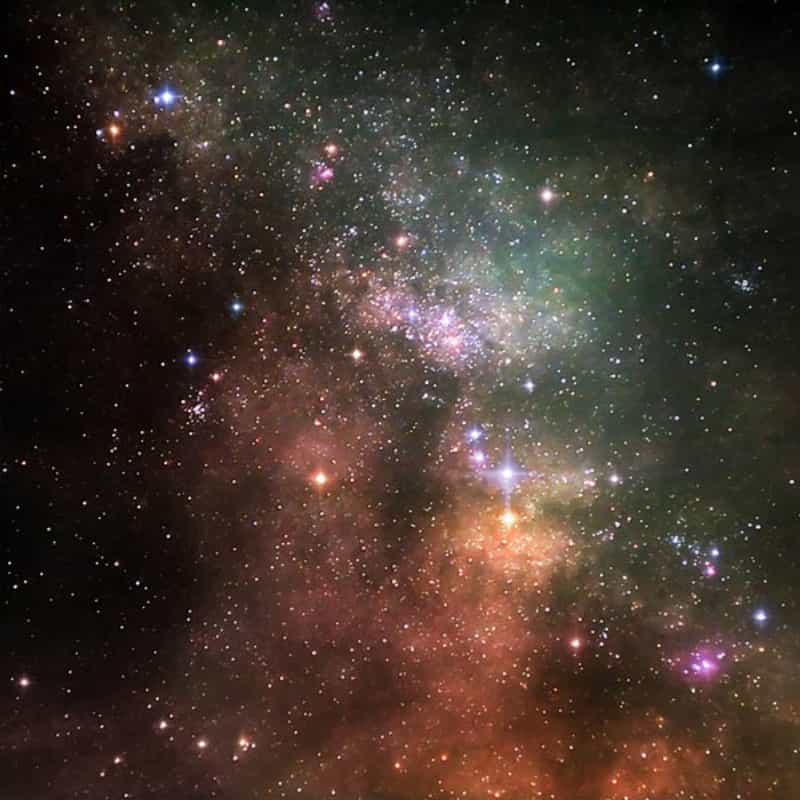
2、这时候看星空图片有些模糊,可以点击"滤镜>锐化>USm锐化"并如下设置。
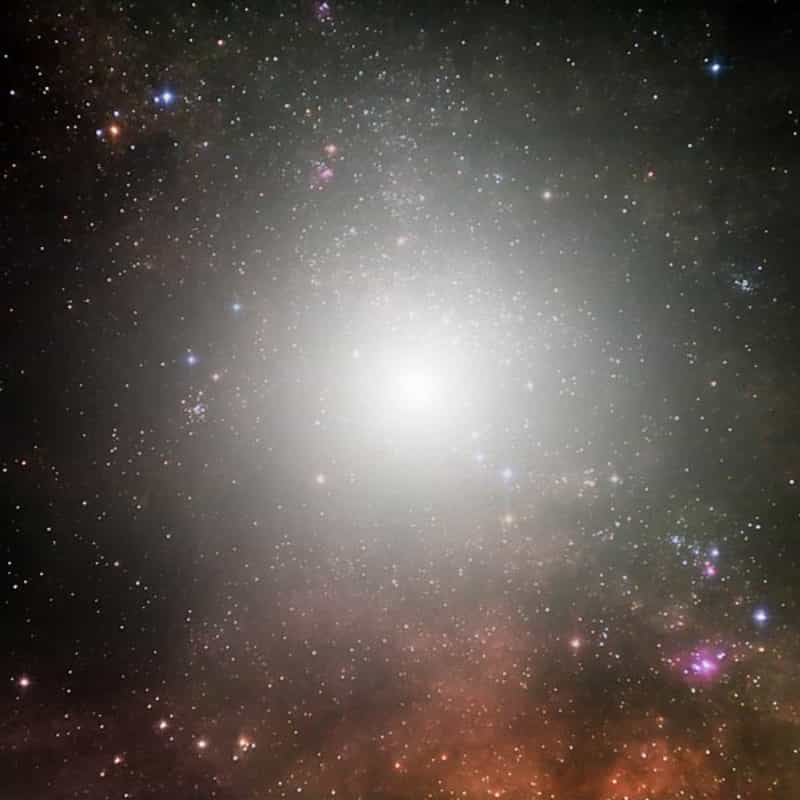
3、下面来将一个光源,新建一个图层,选择"渐变工具",设置颜色为"白色到透明"渐变,在画布中心向外拖出一个渐变,如下所示。
4、完成后将图层的混合模式设置为"叠加",得到如下效果。
5、下面再做更多的彩色光点,新家一个图层,使用上面的步骤,在画布上拖出更多的小的白色到透明径向渐变。
本文由设计学习网整理发布,不代表设计学习网立场,转载联系作者并注明出处.